CREATE SCHEDULES – Quick Overview
Review Positions (Jobs) & Helpers
 Verify that you have added the Positions (Jobs) that you want to use. →More
Set which helpers can work each position on the Positions Grid →More
You also can add or upload new helpers. → More
Your First Schedule
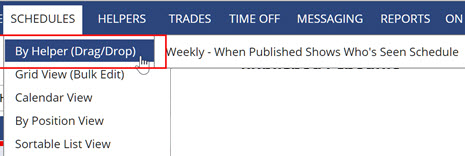 You are now ready to create your initial schedule. The easiest way to put in your first schedule is to enter the shifts from one of your already prepared schedules. →More
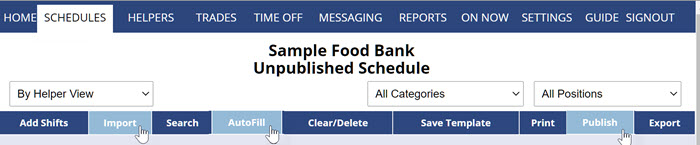
After entering your first schedule of shifts – your work is done…all that is left to do is Publish if you want to allow your helpers to view it online. →More
Your future weeks’ scheduling can now be automated.
Future Weeks – Automatic Scheduling
- Navigate to new week
- Import to bring in a saved template or previous week’s schedule (clearing the work assignments) and make any necessary changes to the shifts.
- AutoFill to automatically assign the shifts to the best helpers for that particular week. AutoFill will use approved time off and any helper work-time preferences along with each helper’s maximum hours/shift per day/week to instantly create the best schedule possible.
- Publish the schedule to make it viewable by helpers when they sign into their individual helper account. When you Publish, helpers can also receive their schedules by email
Quickly send sign in instructions to all helpers who have not yet signed in. →More
You can also control what helpers can see and do when they sign in. →More
start building the system, step by step, how do i start