Add Shifts To a Schedule:
In our system, a “shift” is the time one helper is scheduled for a day. So, for example, if between 8am-5pm you need 4 cashiers, this would be 4 different shifts in our system.
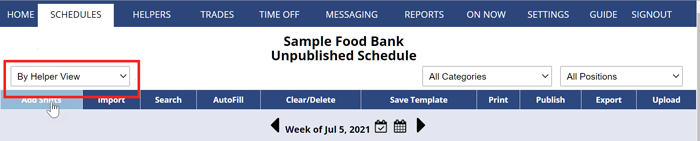
Normally it is best to use the By Helper schedule view to add shifts because it allows you to quickly add shifts without the page reloading each time. To add a shift on that view, you can click the cell that corresponds to the helper/day OR you can use the Add Shifts button on any schedule view (see instructions below).
The only information required for adding a new shift is the position, start and end time, and day(s) to add the shift. Below is an overview of the many options that can also be chosen when adding a shift. Keep in mind that normally you will be using Import to bring in your set of shifts each week – after adding your initial week’s shifts, you should only need to add shifts if you need more than you had the previous week or in your Saved Template.
→Click here for Quick Adding Shifts using the recommended By Helper View
Shifts can also be added from any schedule view using the Add Shifts button
From any weekly Schedule View:
- Hover over the Week of….section and click the week you want to navigate to it. (Or click the arrow or the calendar)
- Click the Add Shifts button to open the Add Shifts window
Optional Category – if you have created categories, you can choose a category to pre-populate the fields with your “category default” information
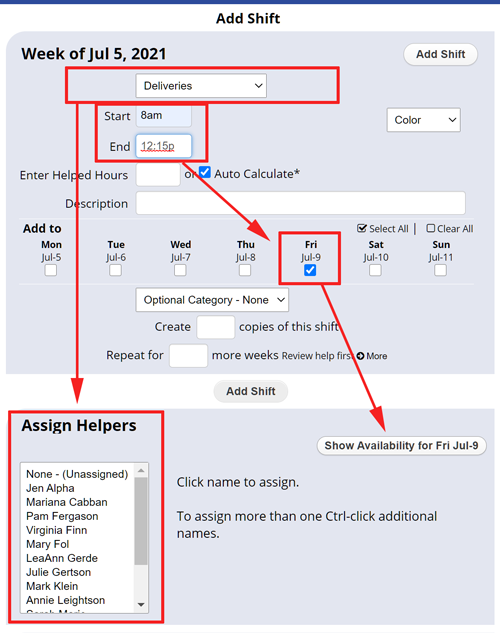 1. Select A Position for this shift using the dropdown menu
2. Start and End time for the shift – Enter the time with the letter ‘a’ or ‘p’ after it to indicate AM or PM. (Ex. 816a) or enter as military time. You can enter any times you like down to the minute
3. Enter Paid Hours (optional) – if the shift includes unpaid lunch or break time you can uncheck the Auto Calculate box and enter the time the helper will be paid (Ex. 8am to 5pm with an hour lunch enter duration of 8 paid hours)
4. Description (optional) – any text you want included with the shift
5. Days to add Shift – check off the days you want to add this shift
6. Create copies of shift (optional) – if you need more than one helper for this time period to work this position, enter how many workers are needed (or Ctrl click to choose multiple helpers in the Assign section)
7. Repeat Shifts – If you want to repeat the shift(s) over a number of weeks, you can enter the number of weeks
8. Click the Add Shift button
Note: After adding the shift(s), the window will stay open for you to enter more shifts. For your convenience, the Position, start and end times, etc., are defaulted for the next shift.
To change the times, simply click and type in the new times. When you are finished adding shifts for all of your Positions, click Done, and the window will close.
Your schedule will now display with the new shifts and you are ready to make any needed changes you can then use AutoFill to make the best assignments possible for your shifts.
You can then use optional information that can be entered for any shift
Description (optional) – which can be displayed with the shift on the schedules (Ex. if there are special instructions to the helper or to display meal or BREAK TIMES) and is included in shift notifications.
Assign Helper(s) -You can assign an helper manually when adding a shift by clicking the helper name (to choose multiple helpers, hold down Ctrl and click multiple names in the list). In most cases, you will leave the assignment as None (unassigned) so that AutoFill will choose the best helper for you.
Categories – If you have shifts with similar begin and end times over multiple Positions, you can create Categories for faster entry. Click the Category drop down box and choose Add / Edit Categories to create categories with Add Shift default information (Ex. if you have similar night shifts for different positions, you can create a NIGHT Category and enter the defaults so that when you Add Shifts, you can first choose that Category, and the fields will be prepopulated but changeable for you).