Once you have entered your first schedule, it is easy to create new schedules using the Import feature. Import any previous week “as is” by choosing a date, or Import a saved template by choosing a template name. When Importing, you can check off to clear all the old work assignments and then AutoFill to get the best possible work assignments for the new week. When your schedule is ready you can Publish and you are done!
Note that by first filtering your view to a certain position or category before clicking Import, you can Import only those particular shifts from the previous week or template.
To Create (or add shifts to) a Schedule using Import:
From any weekly Schedule View:
- Click Week > to navigate to the new week you want to schedule
(Check that your Category and Position dropdowns are set to show “All” to import all Positions and - Categories from the template or week)
- Click Import to open the Import window
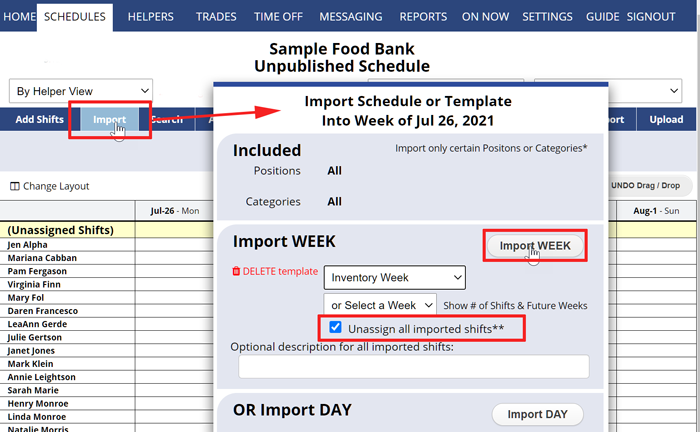
- You can Import any other week into the current week (by selecting the Week in the dropdown), or if you have saved templates, you can Import them by choosing the template name.
- Check the box to “Unassign all imported shifts” so that the assignments will be cleared when the shifts are brought in (or you can Import as assigned and then use the Clear Function later)
- Click the Import Week button
You also can Import shifts for one day at a time by using the “Import a Day” in the bottom section of the Import window.
Note: you can also filter your view to a Position or Category before Importing to bring in only those shifts.